Couched Landscape Art Quilt for Island Batik
June’s challenge for Island Batik Ambassadors is Try It! Ambassadors were instructed to have fun with going outside our box to try a technique that is new to to us. Life on the shore of Lake Michigan gives me many opportunities to photograph landscapes that include water. I’ve created so many art quilts using my favorite confetti art quilt technique. It was time to step away from what was familiar and explore something new.

Using a photo as a guild, landscape colors were selected from my Island Batik stash. These fabrics were torn into 1/4” to 3/8” strips. Sharpie markers show roughly where each color will be stitched on to the Thermore Batting provided by Hobbs Quilt Batting. Using the teeny, tiny strips of Island Batik fabrics for my painting pallet, the application is ready to begin.

There was some experimenting on my Handi Quilter Avante' long arm. I worried a bit about the size of the torn island batik fabric. I tried the Glide Foot first with no success as the needle hole opening was too large. The actual couching foot worked best to begin creating the sunset design. I used the yellow 3 mm foot with great success. Neutral, 50 wt Aurifil thread was used for stitching.

with all of the teeny, tiny strips of Island Batik fabrics have been couched to the art quilt, it was time to add some depth and perspective. Yarns, threads and 'stuff' are auditioned on the quilt before adding the foreground details. Glide Foot worked perfectly for this application.


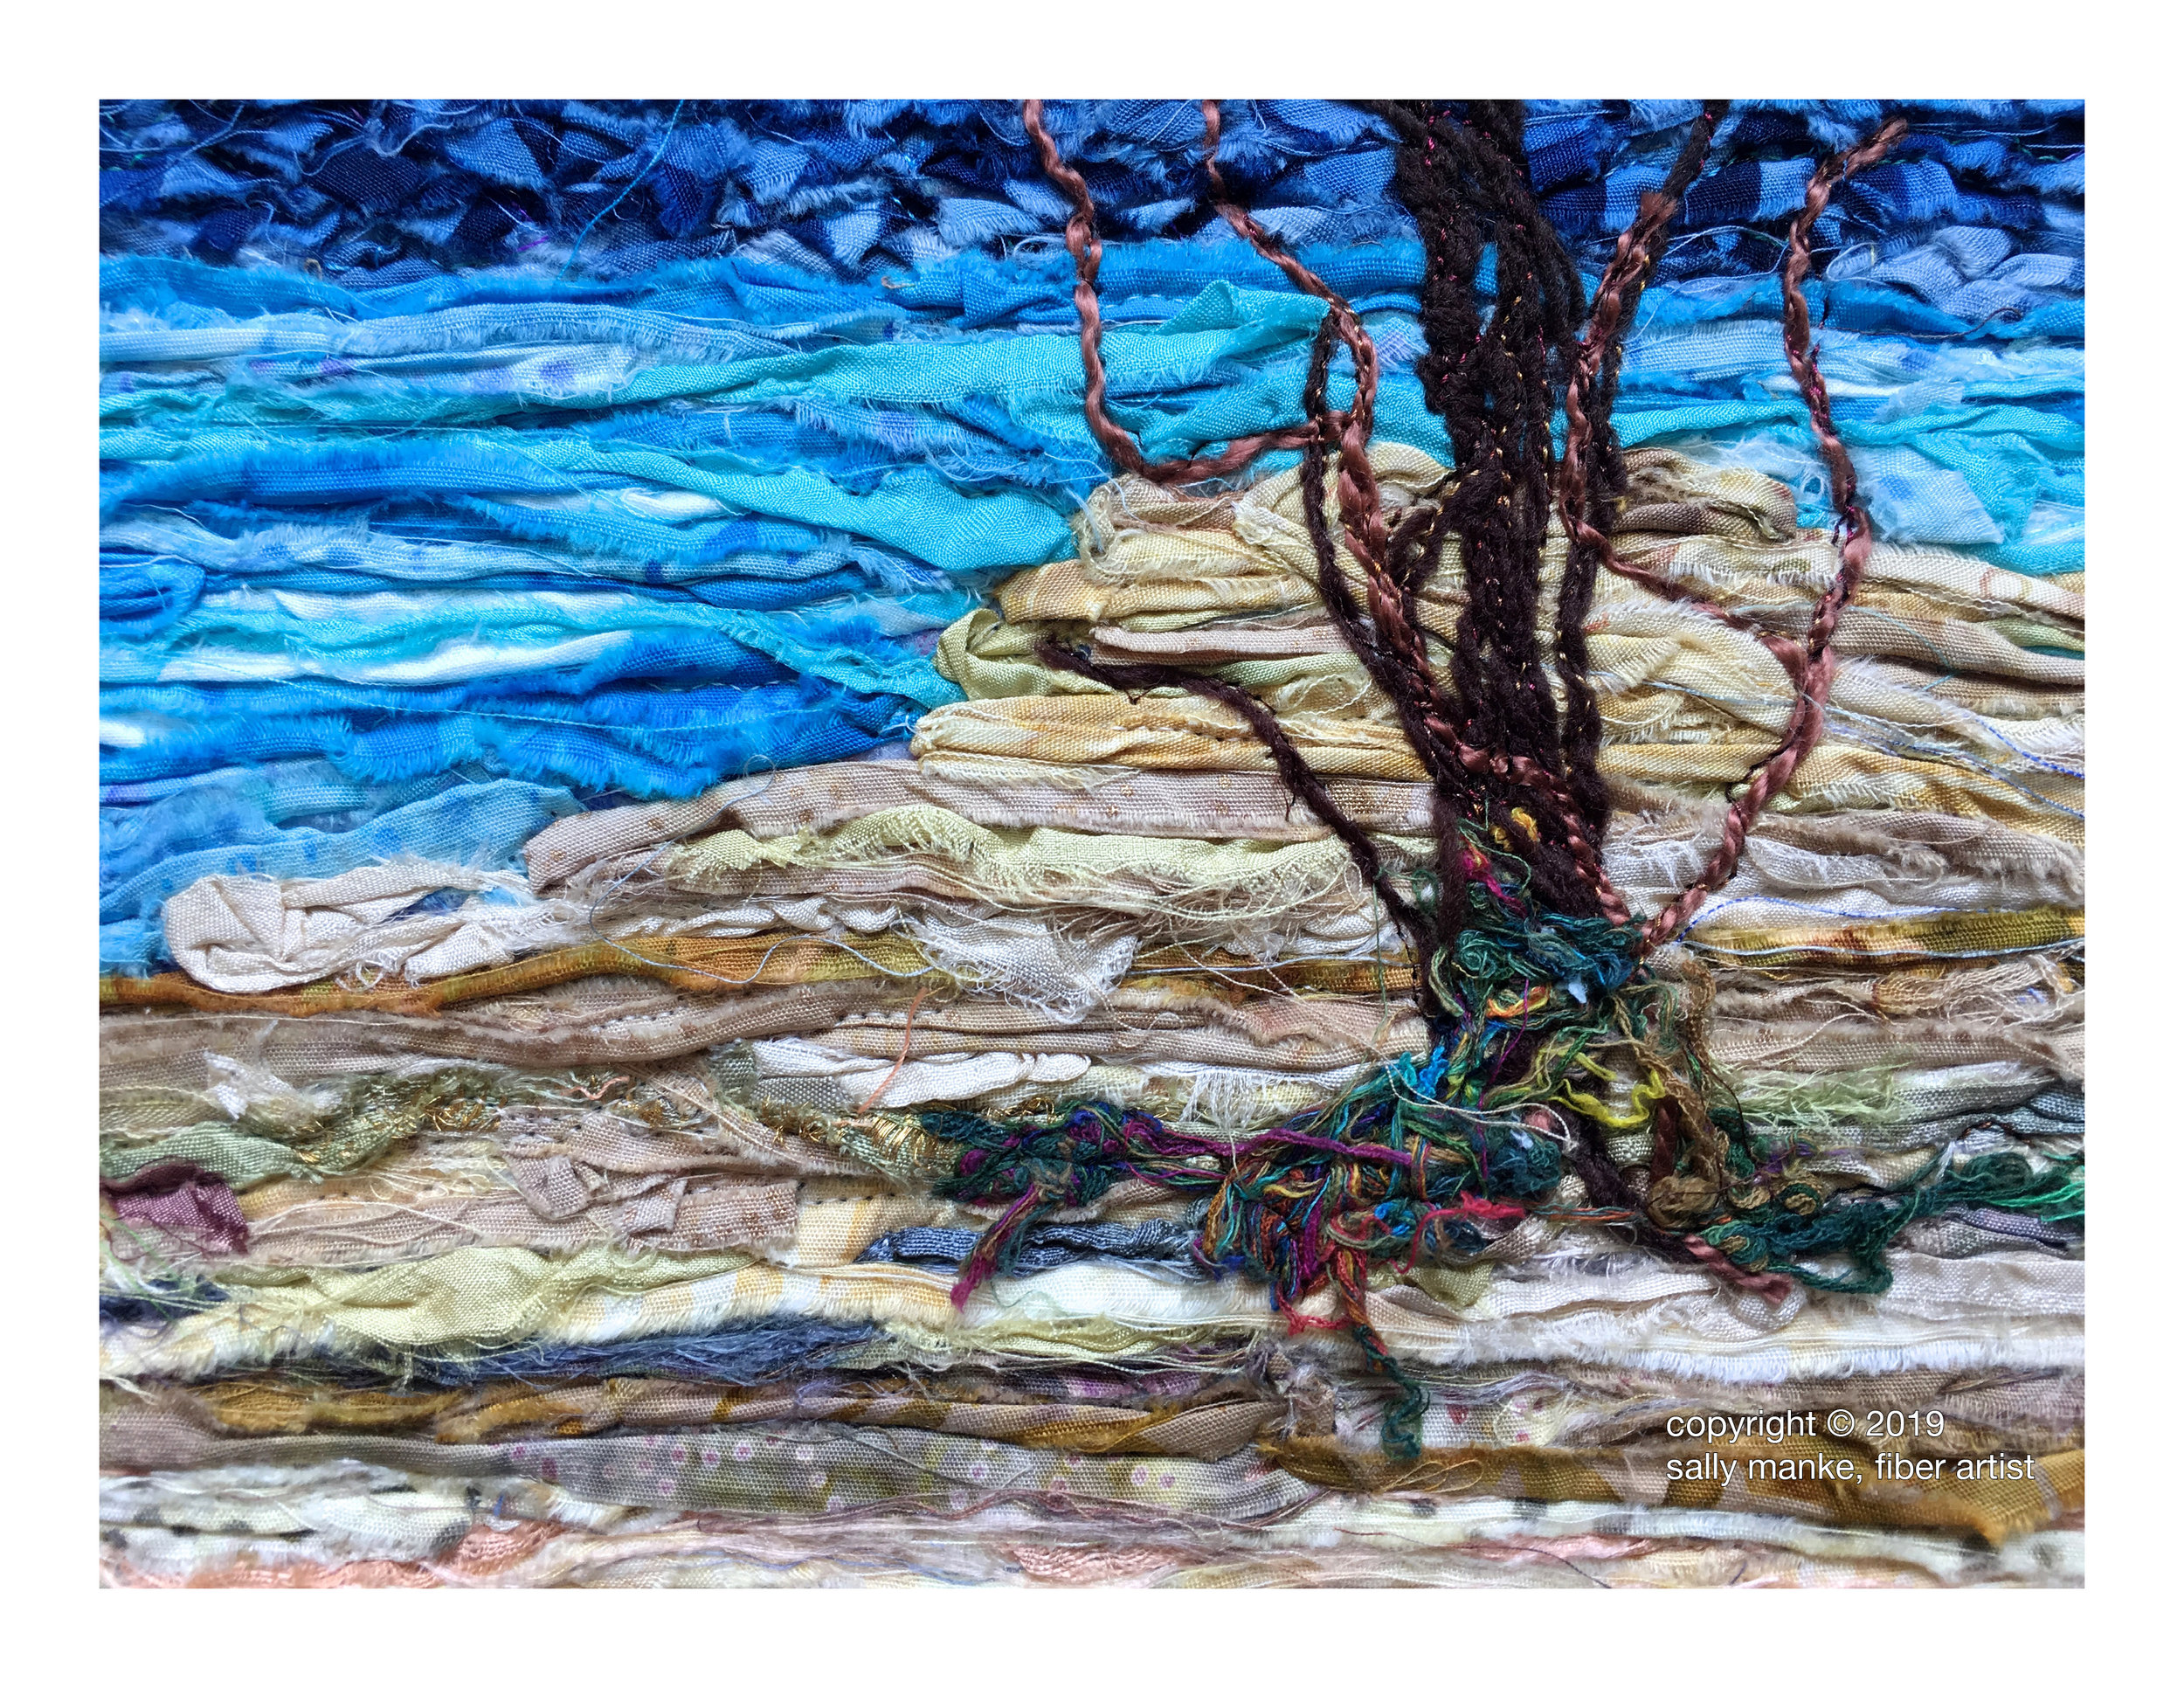
Close ups of the art quilt allow you to see some of the design on each fabric strip. Color is the most important element but the torn edges and depth of each couched strip add texture and interest to the work.