
Bags By Annie for Island Batik
The September Island Batik Ambassador challenge is to create a bag of our choice from the byAnnie collection. We selected from a specific group of patterns with Add-on Videos™ supporting specific parts of the ByAnnie patterns and help us learn the best techniques. The add-on videos don't replace the pattern but rather enhance the sewing experience.
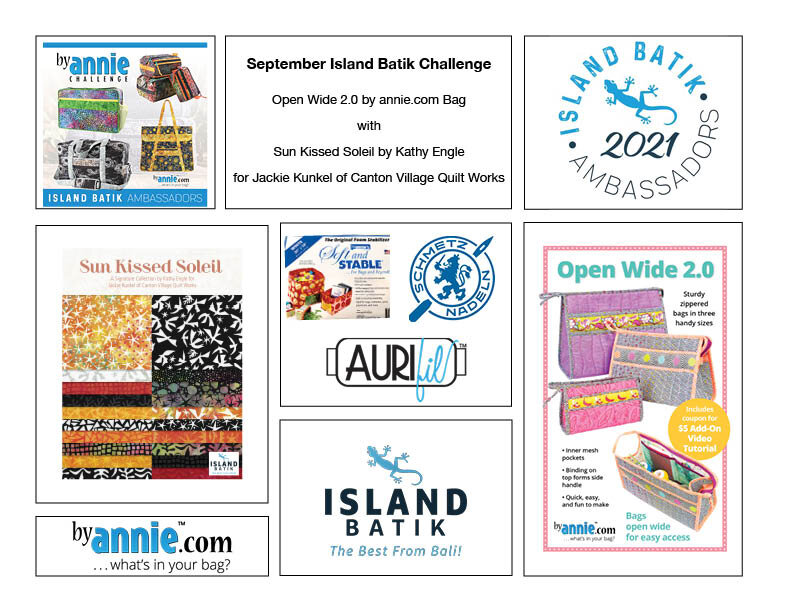
I’ll be creating this project with three fabrics from the Island Batik Sun Kissed Soleil collection by Kathy Engle for Jackie Junkel of Canton Village Quilt Works along with Aurifil Thread, Schmetz Needles and Soft and Stable stabilizer. These supplies have been provided to me in my role as Island Batik Ambassador.
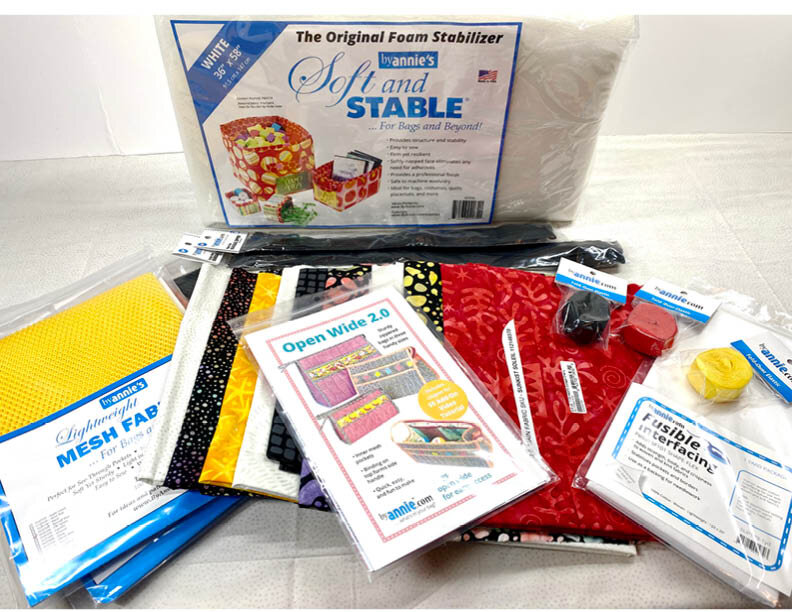
The supplies include the Open Wide 2.0 pattern featuring three sizes. Each bag goes together with over 23 separate pieces. Other items are Soft and Stable foam stabilizer, mesh fabric, fusible interfacing, nine cuts of Island Batik, zippers for three bags, and fold over elastic in three colors. All stitching will be completed with the provided Aurifil thread and Schmetz Needles on my Bernina 770.

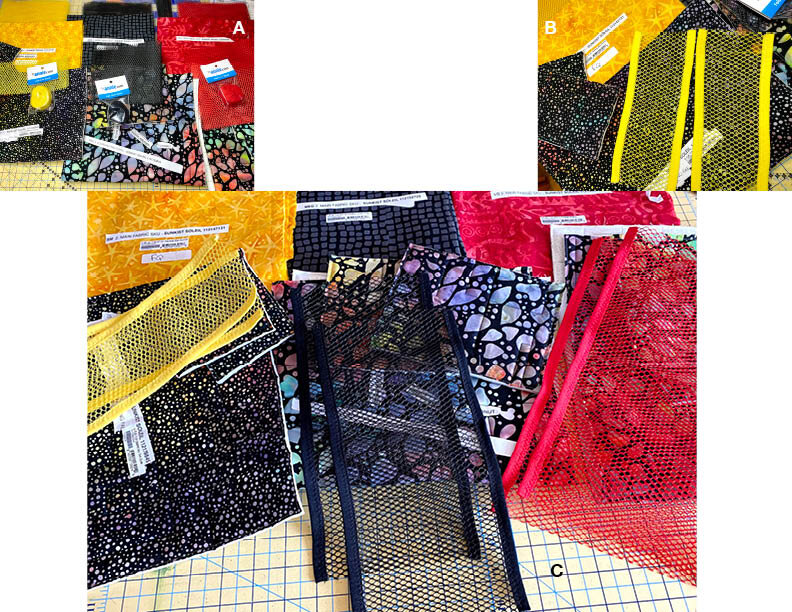
For most projects, quilting is one of the last steps but bag creation is just the opposite. The fabric for Annie Bags is quilted first. (A.) Island Batik Neutrals, Coconut and Sprinkles, are loaded on my Handi Quilter Amara followed by Soft and Stable then two batiks from the Sunkist Soleil collection. Both larger bags will be Ivy Tourmaline while the smaller is in Mini Dot Dusk. (B.) The darkest gray from my Aurifil sampler was used in both the bobbin and needle for quilting. (C.) Nancy Haacke’s Maze design looks great on both the top fabric and backing fabric.
Three pieces are cut for each bag from the quilted fabrics. (A.) They are matched up with their coordinating mesh fabric and fold over elastic. (B.) The smallest bag’s mesh pockets are completed. (C.) Mesh pockets are completed for each size bag by binding the top and bottom edges with fold-over elastic. Side edges will be buried in seams.

Details, details, details. Time to get important steps completed before construction begins. (A.) End strap cut from coordinating fabric, pressed, and attached to one side of the end. (B.) Using the Clover USA Bias Tape Maker to accurately create a 1/4” zipper pull. (C.) The top edge of the end piece is bound with coordinating binding. (D.) Stitching pockets to the inside of the bag.

Corners have been rounded on end pieces and are ready for assembly. (A.) Raw edges on each bag are bound with coordinating Island Batik fabrics. Yellow waiting for application, red binding stitched on and black binding ready for second stitching. (B.) Bias binding ready to be machine stitched to cover raw edges. (C.) Stitching complete. (D.) All three sizes have seams bound.

OOPS! Remember those 23 pieces cut and labeled carefully? Evidently, the end pieces that I finished with BIAS binding should have had STRAIGHT of GRAIN binding. I actually had that thought when I was stitching but didn’t stop to check the directions. Too late to go back now…the zippers are all stitched into the bags. These edges are bound with the correct straight of the grain binding!

WOO HOO! Three Open Wide 2.0 in three sizes are ready to fill with quilting supplies for my next teaching assignment. Check the events page on my website to see where I’ll be next. https://www.sallymanke.com/events

Three completed bag ready for keeping quilting supplies safe and organized as I travel the country teaching art quilt classes.

Isn’t it wonderful that these bags are completely washable? Granddaughter, Eleanor, hijacked the smallest bag to capture lady bugs on Lake Michigan’s beach. She biked down to the beach three times to gather lady bugs which she then released in my flower gardens.