
Inside Out - for Project QUILTING 15.3

Project QUILTING challenges push the envelope for thinking and this week was no exception! The Inside Out directions read, “Make a project with exposed seams or a raw-edge finish. Take on a bag pattern or other project that is constructed inside out and then literally “birthed” as part of the process. Or use this as a theme and demonstrate your unique inside-out perspective.”
My first thought was raw edge applique (which I love) or a rag quilt with all those exposed cut edges. As I read further in the description it suggests something that is made inside out, then ‘birthed’ to reveal the final project. That’s the idea that sparked my interest.
A huge thank you to Kim Lapacek of Persimon Dreams and Trisha Frankland of Quilt Chicken for sponsoring Project QUILTING each season.

Just like with all birthing, it all begins with the baby. In this case, the baby is conceived from a scrap of batting and scraps of a former project. Many quilters toss out scraps as small as 3/4 inch wide but I save EVERYTHING.
Using a neutral-colored thread and my BERNINA B790 Plus, strips are stitched to batting using the quilt-as-you-go method. The seam allowance is 1/4 inch. The next strip is added matching raw edges together until it’s approximately eight to nine inches.

If the last section was the baby, this portion must be the mom.
Two 7-1/2 X 9-1/2 inch rectangles of Hobbs Premium 80/20 Cotton/Poly Fusible Batting are fused to the wrong side of two pieces of Cherrywood Hand-Dyed Fabric. The fabric was cut the same size as the batting. NOTE: If fused batting is unavailable, use spray adhesives such as Odif 505 Temporary Fabric Adhesive or a lightweight fusible webbing such as Misty Fuse to adhere batting to fabric.
An egg shape was marked on the wrong side of a slightly smaller fabric. Centering the smaller fabric on one of the batting fused fabrics with right sides together, stitch on the marked line. Trim the center out leaving 1/8 to 1/4 inch. Clip curve.
Turn facing to the right side and press.
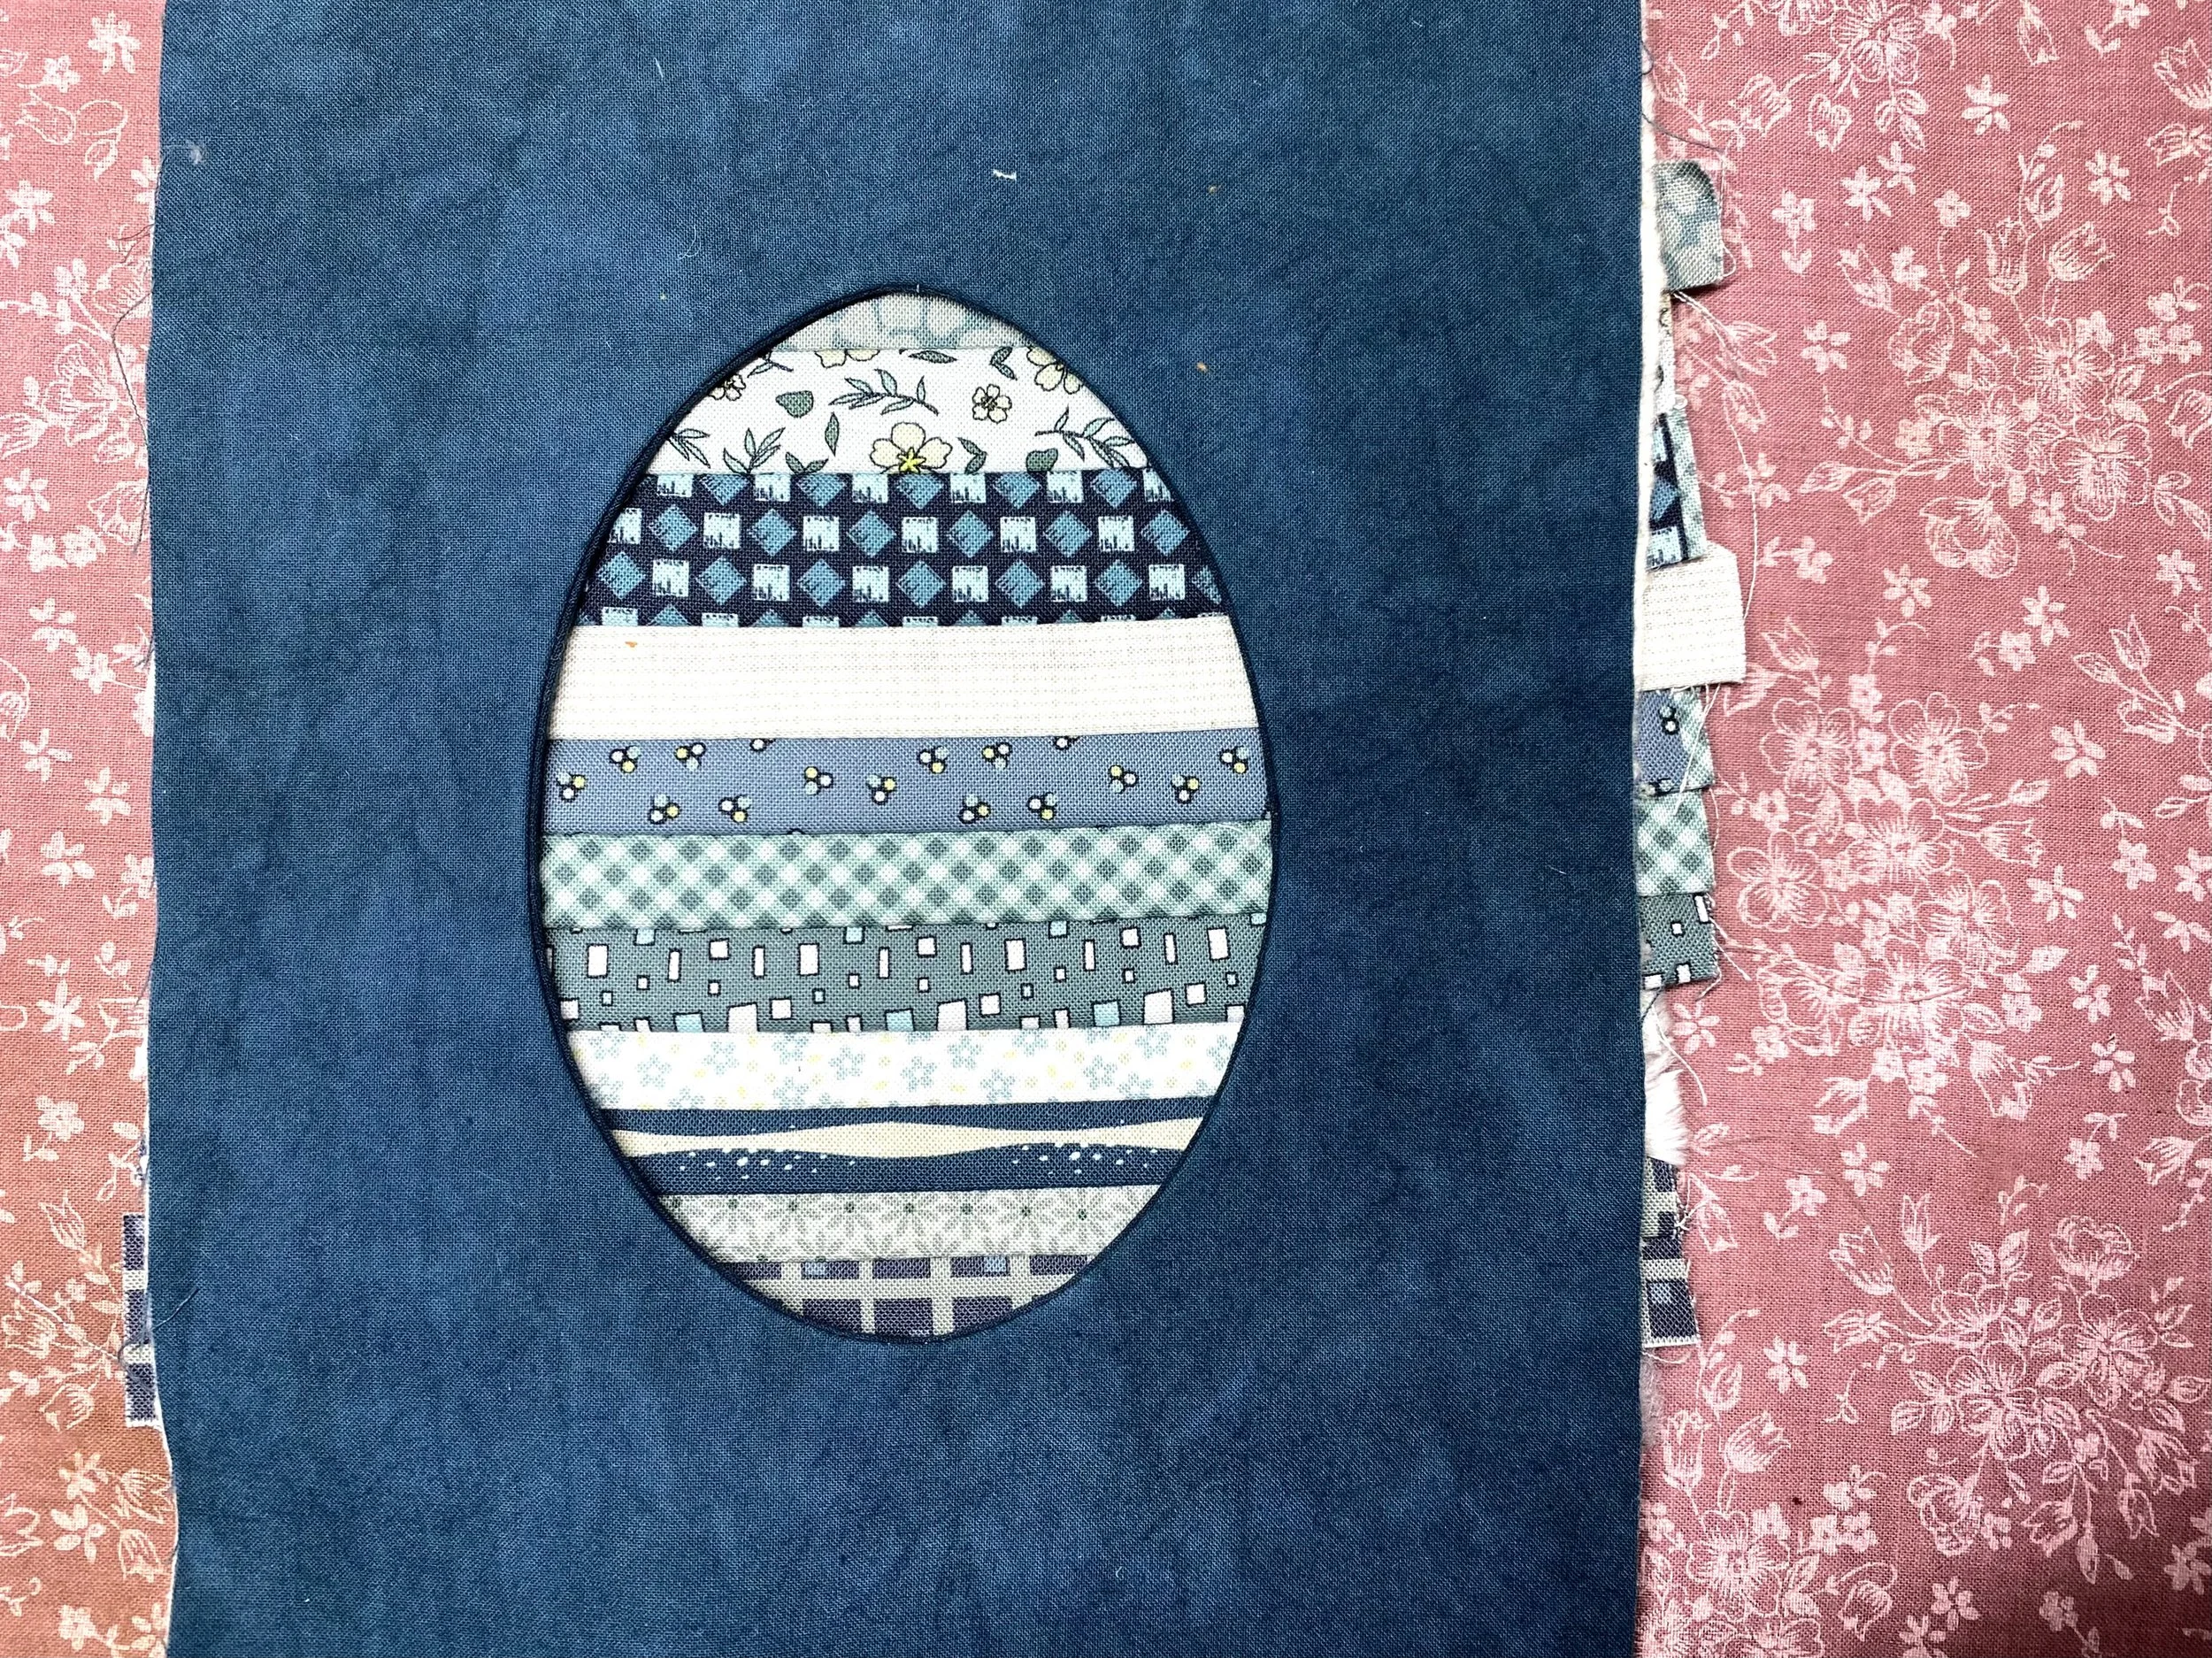
Place the quilted strip section under the opening. Trim strip section approximately one inch smaller than the frame unit.

Place batting fused fabrics with right sides together. Stitch 1/4 around the entire unit overlapping stitching at the start. Miter corners. Lay the strip unit over to check for size.
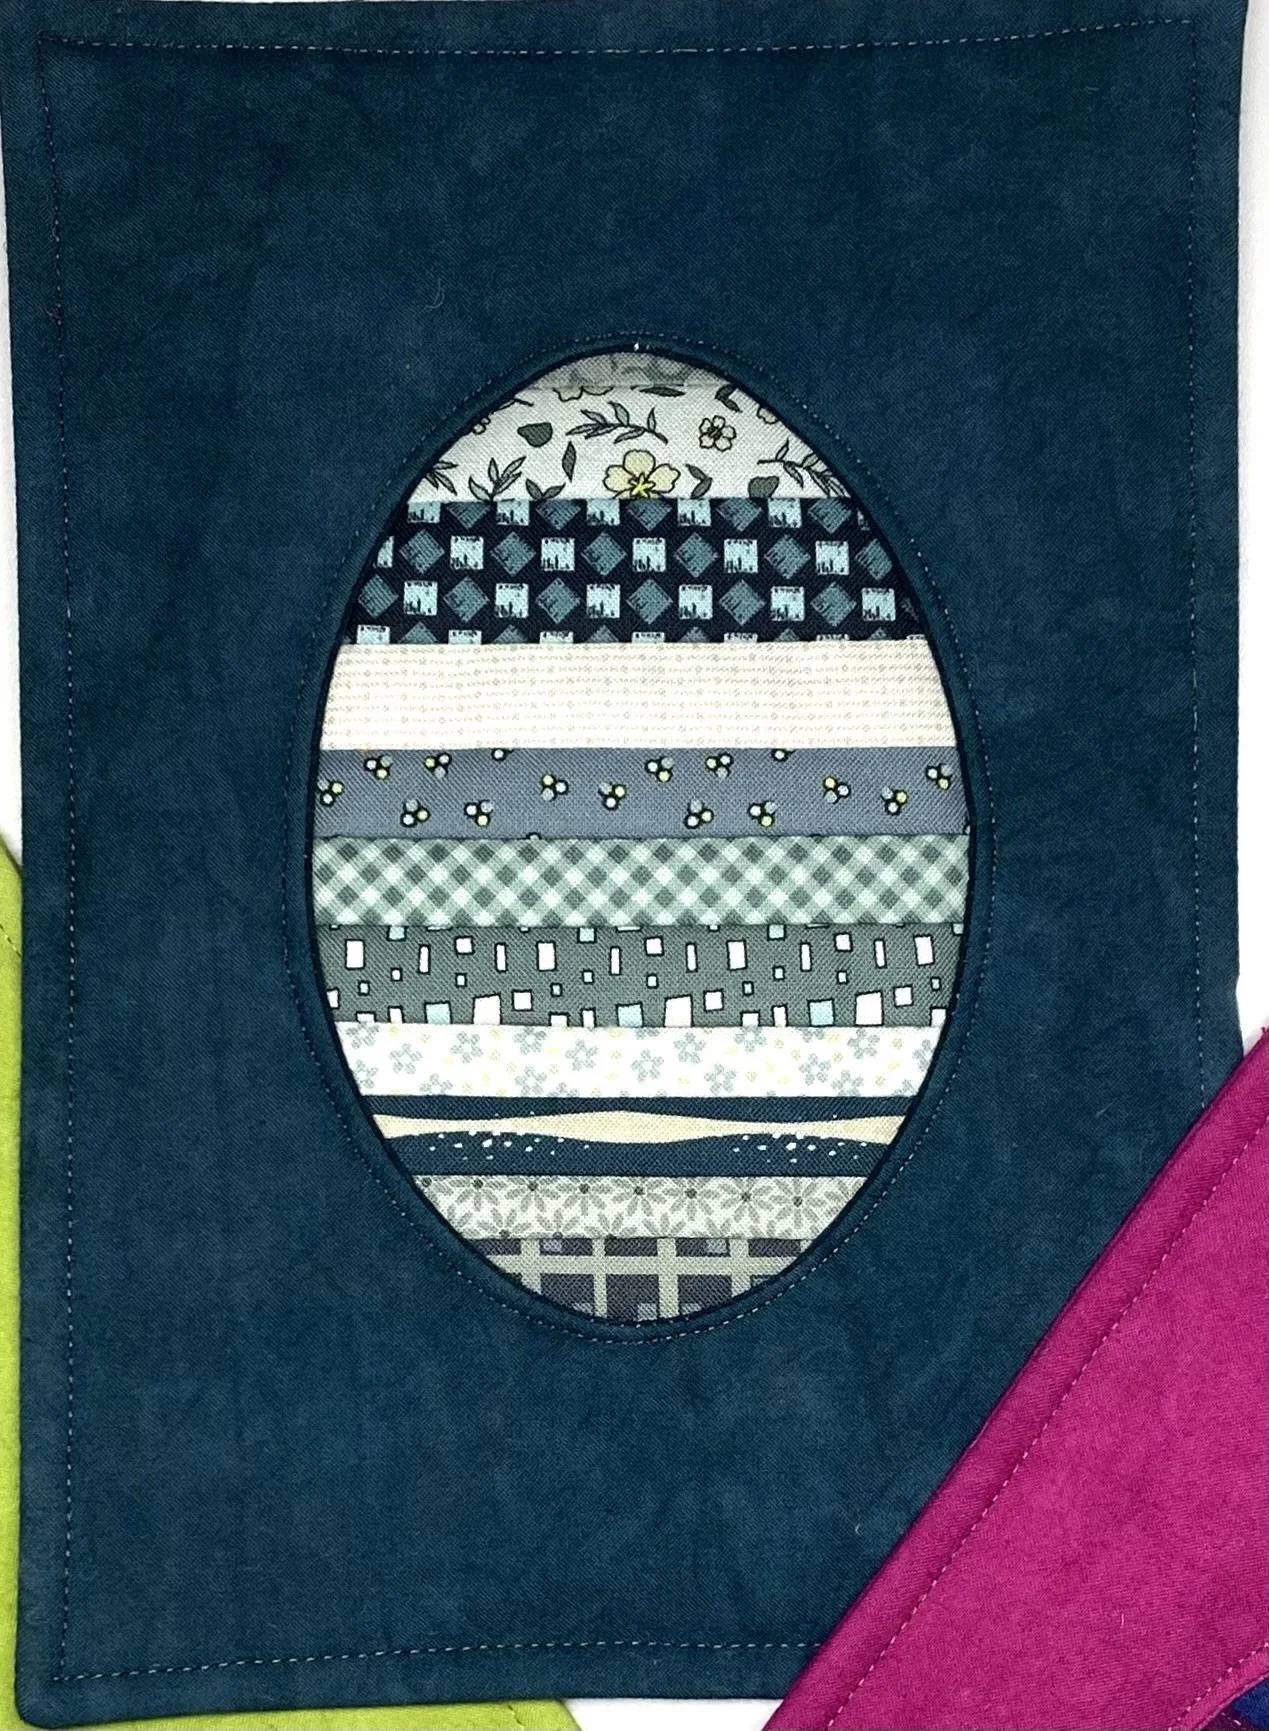
Set strip unit asside and turn outside frame right side out or ‘birth it’. Press. Insert strip unit into frame. Edge stitch close to frame opening and 1/4” from outside edge.

More scraps are always at hand so continuing with the Easter theme, a bunny rabbit was created.
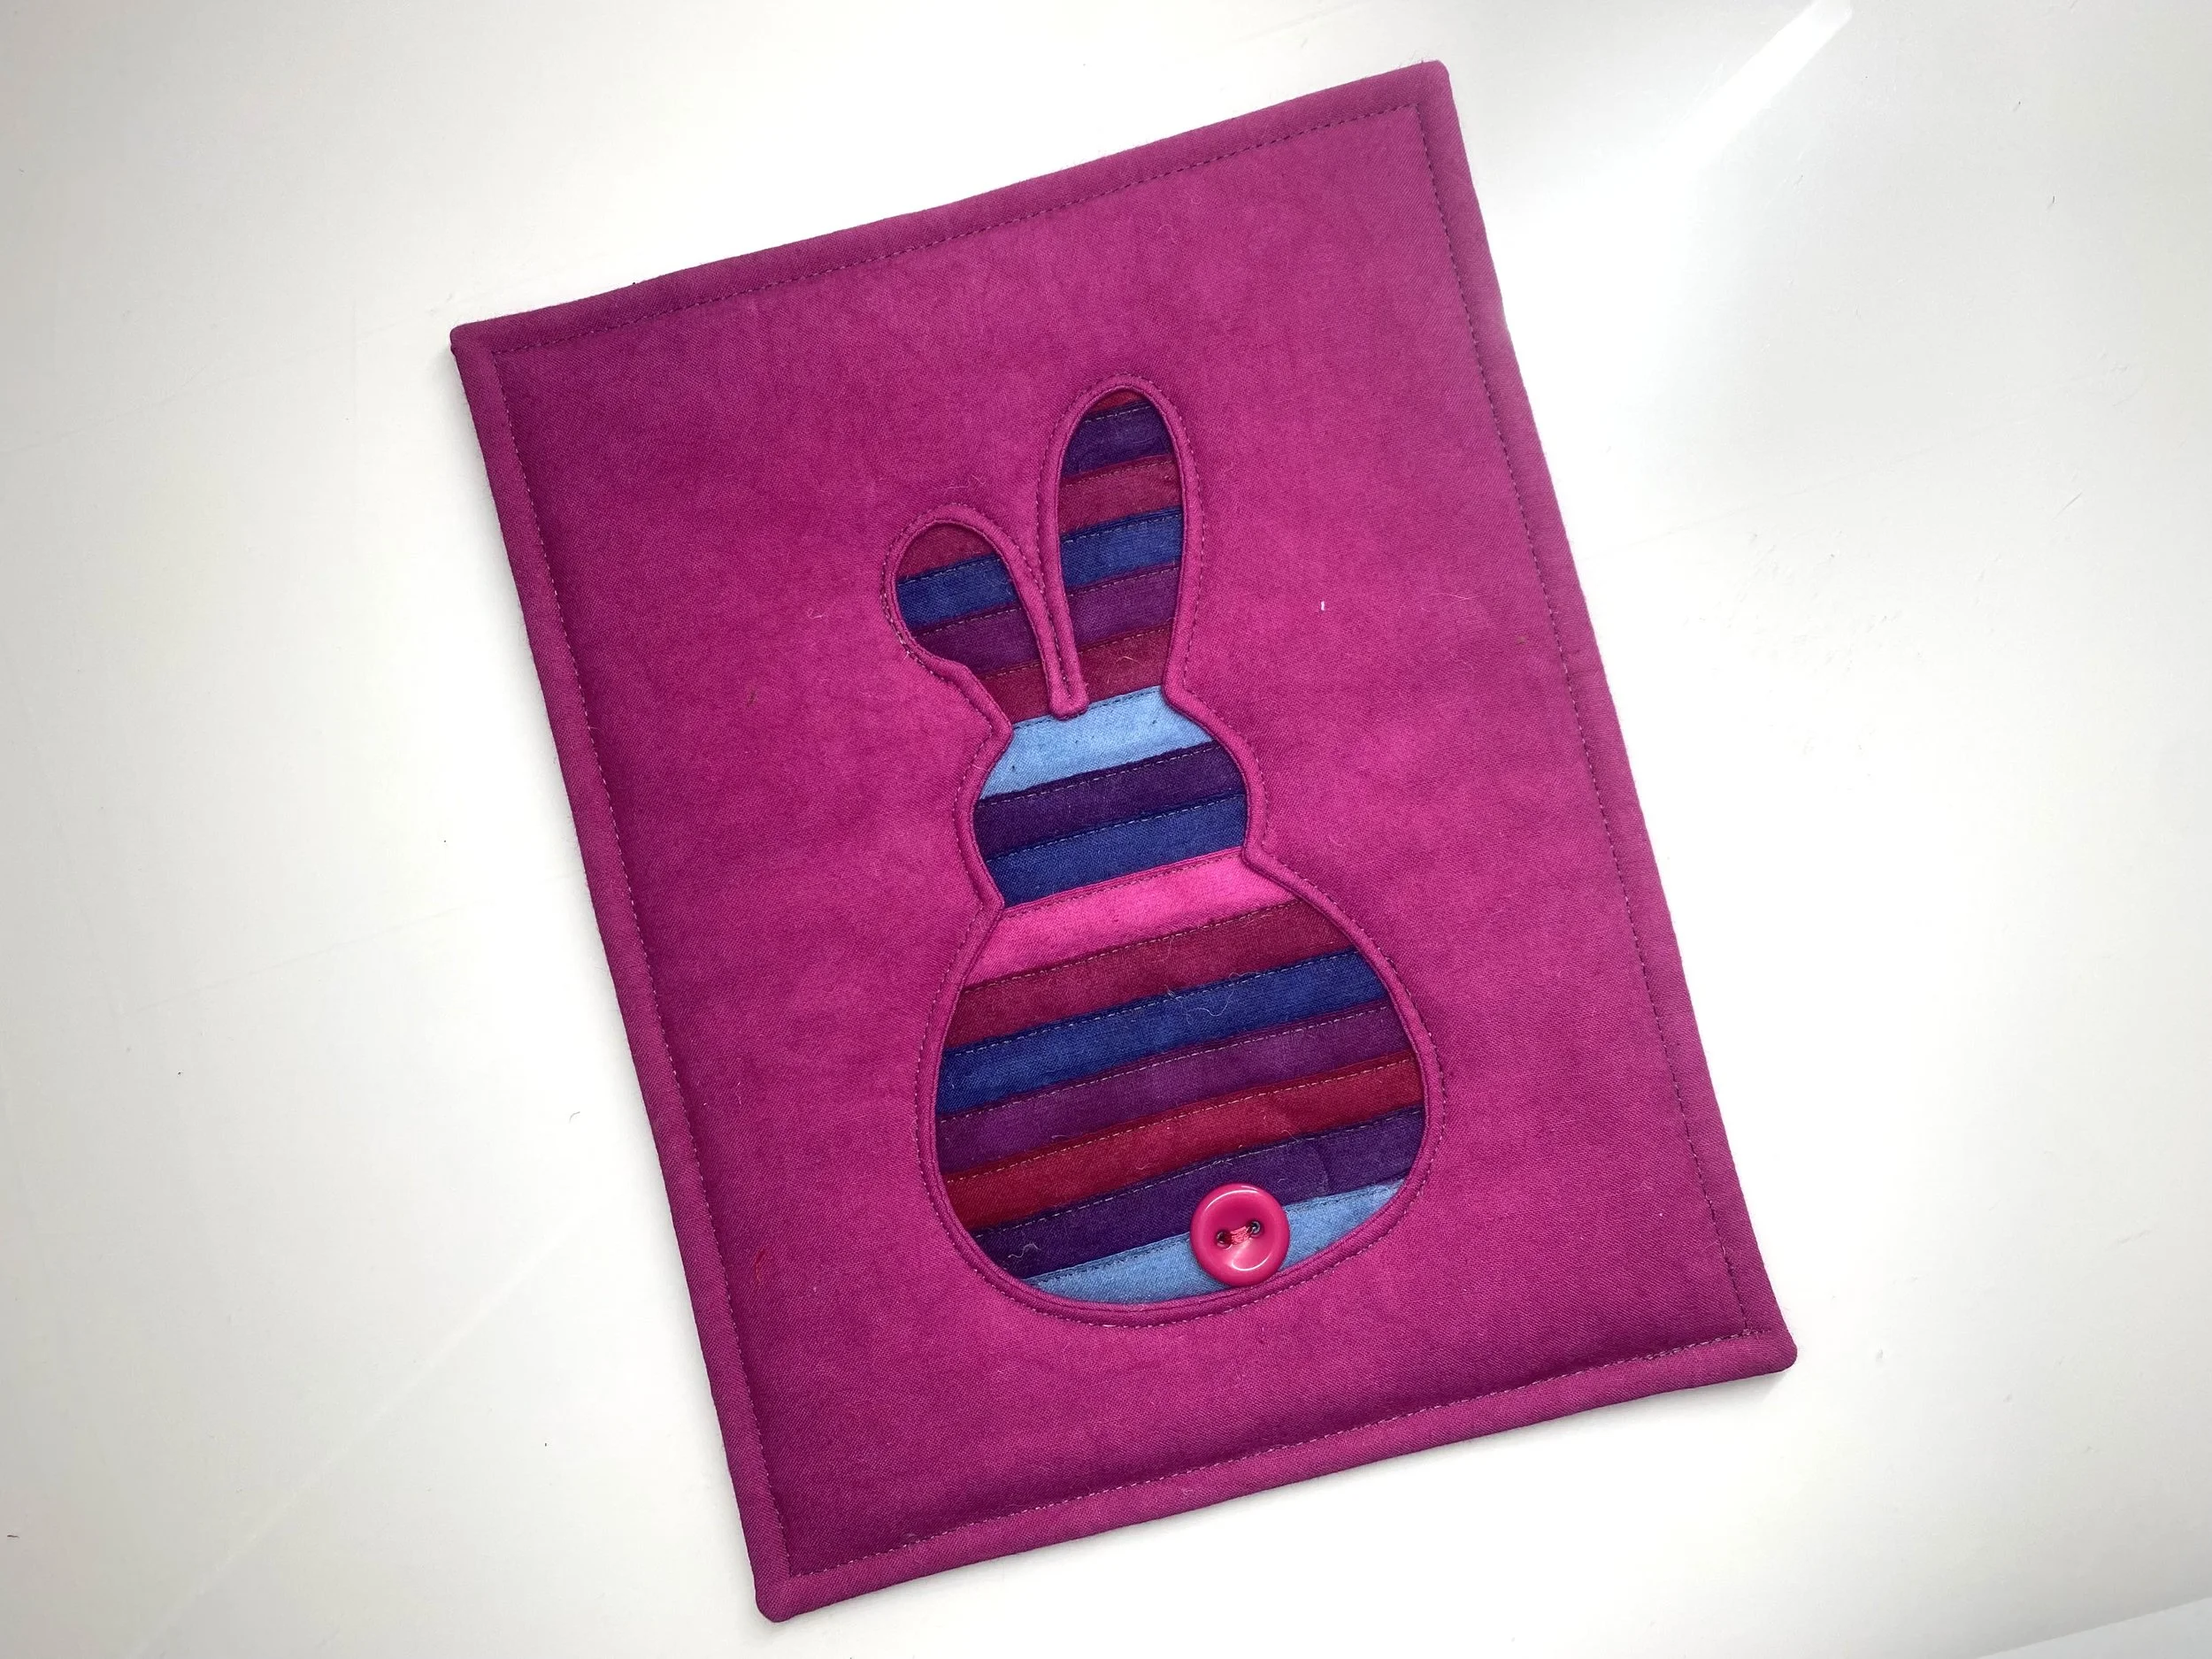
This bunny even got a tail! I am such a non-hand stitcher, even my buttons are attached with the sewing machine.
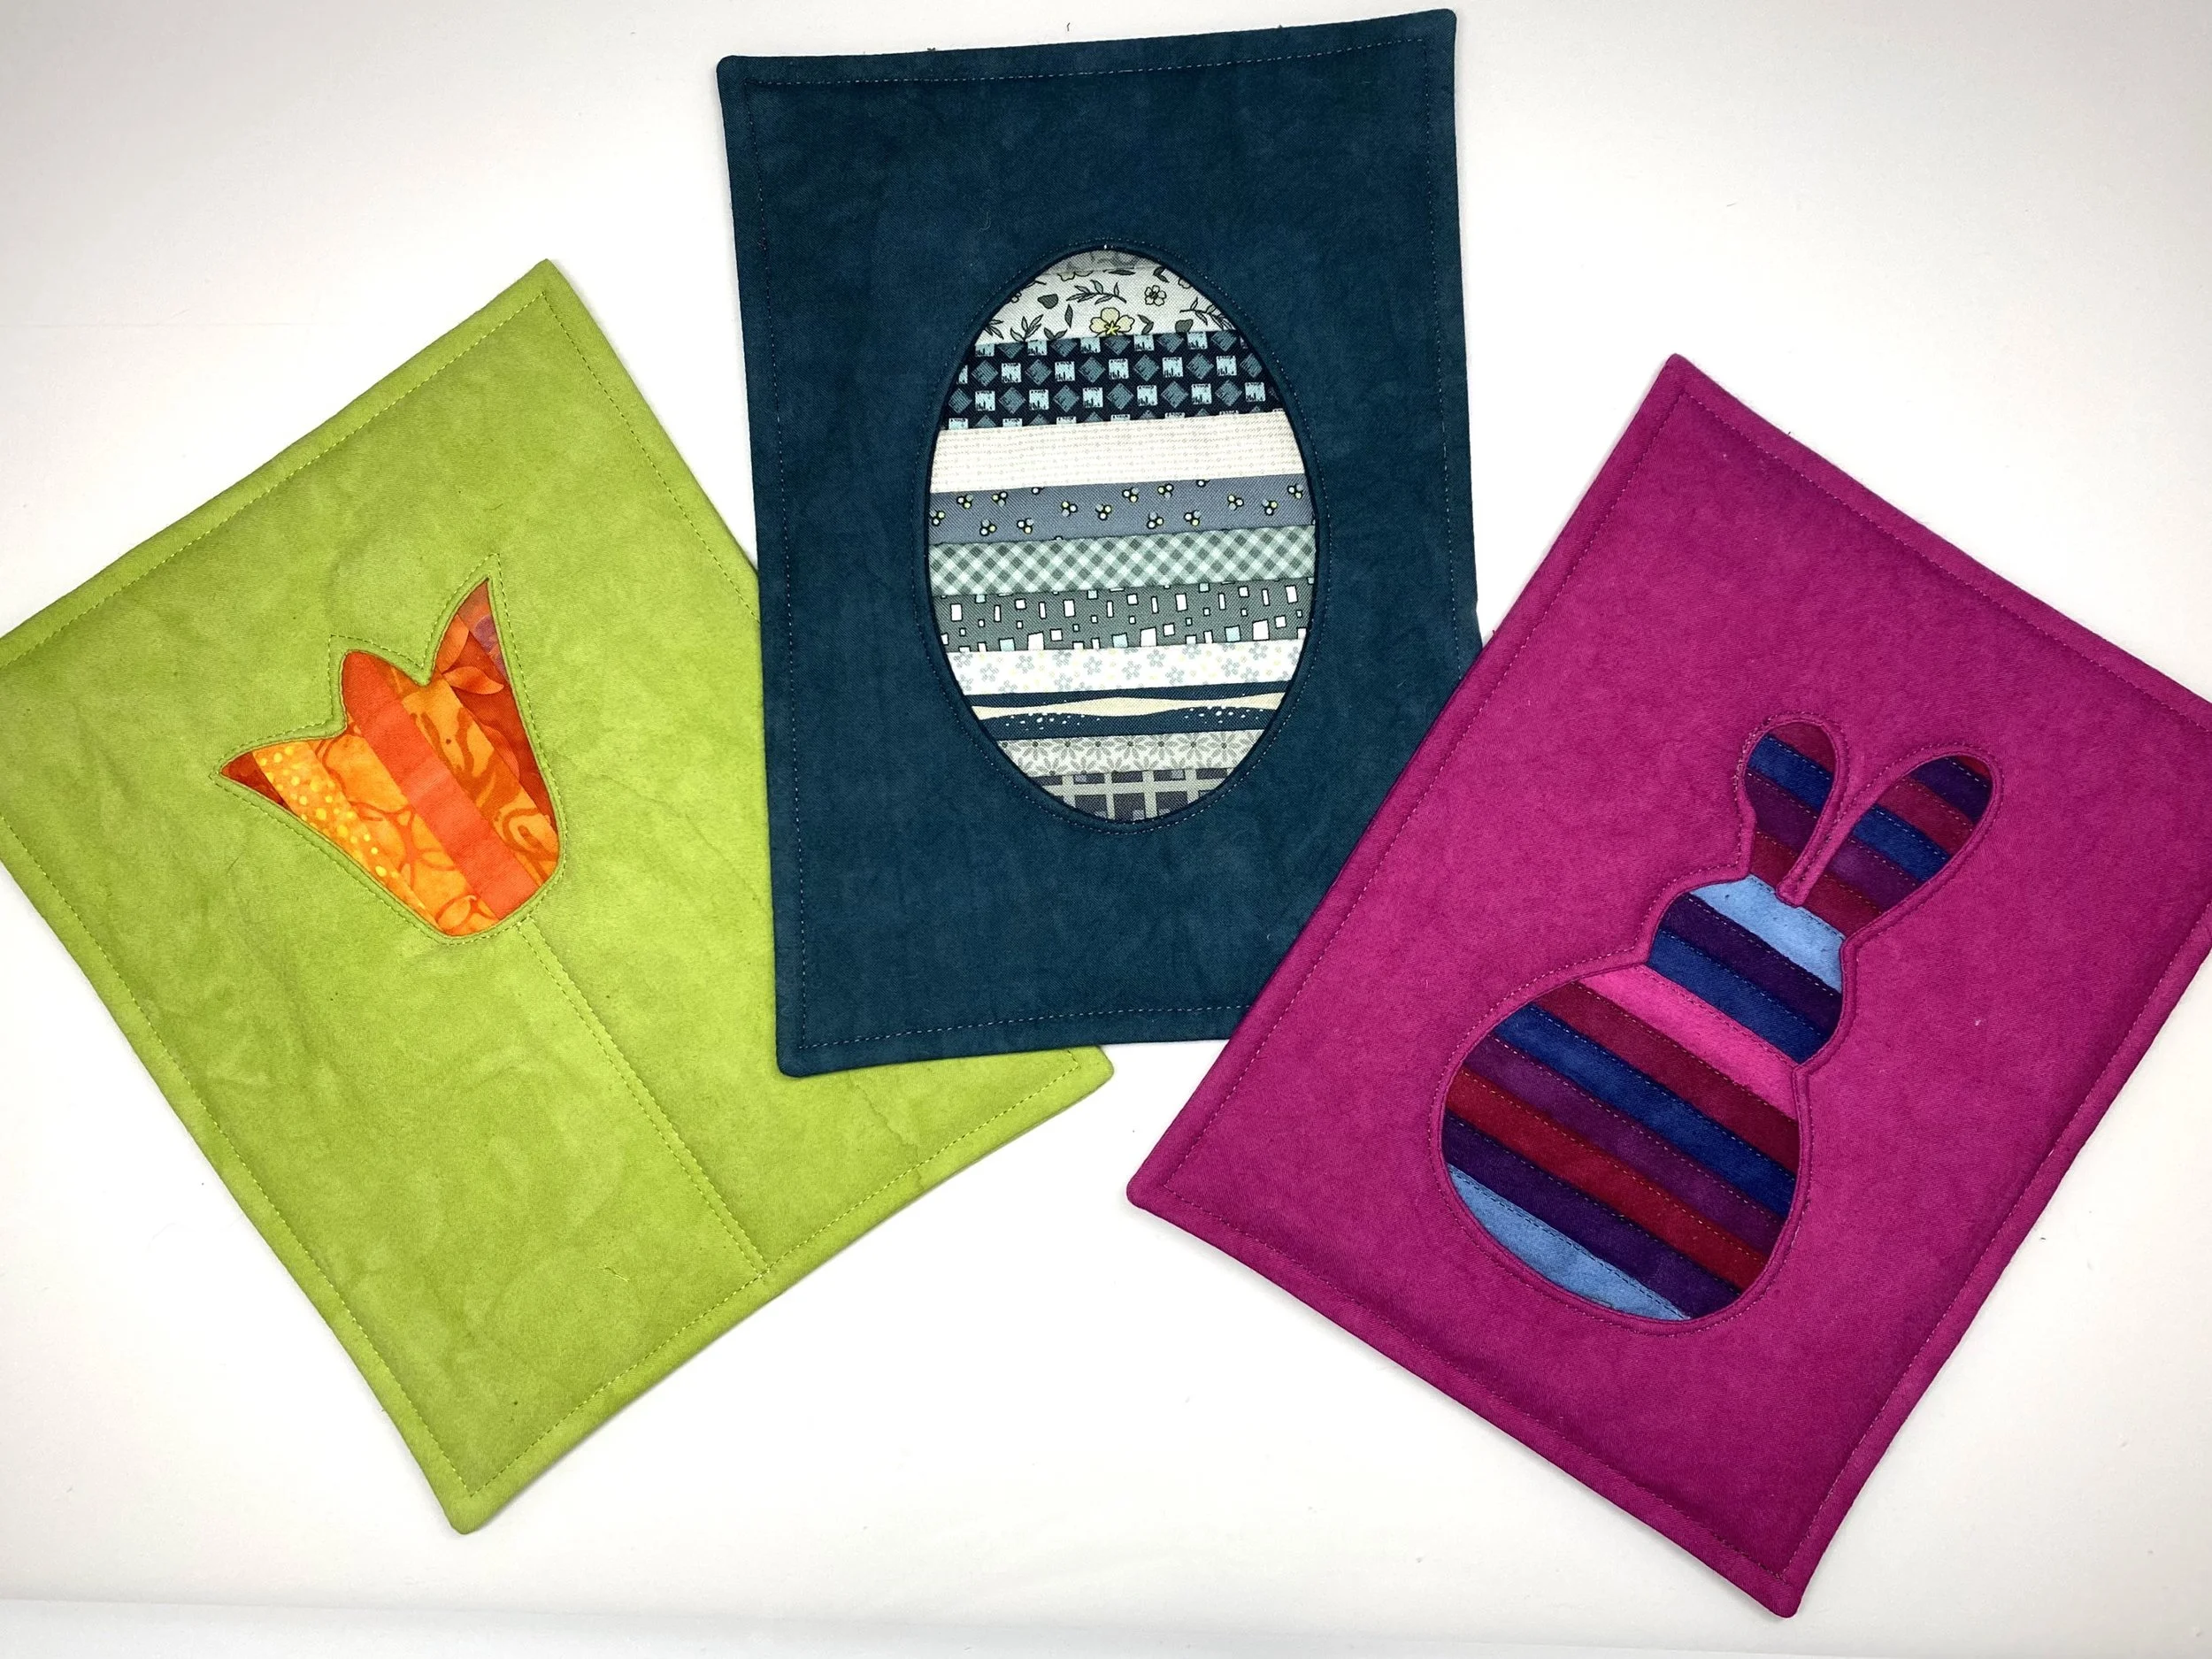
Enough time and scraps were available to complete three inside-out mug rugs. Each finished at 7 X 9 inches. The quick no binding-needed finish of this project is a huge plus when you need a quick gift or holiday decor. I’m linked up to the challenge here.
Published by Sally Manke, Fiber Artist
Sally Manke's mission is to delight others with textile art that exemplifies her passion for joyful, creative expression through color and texture. She is a speaker, teacher, pattern designer, and fiber artist. Contact her to book a workshop or trunk show at this link. Visit her Etsy Shop at www.sallymanke.etsy
Sally is a brand Ambassador for BERNINA USA. All stitching on this project was completed on a BERNINA 790 PLUS.