
Waterlilies Art Quilt for Island Batik
The April challenge for Island Batik Ambassadors is Creative Borders and Bindings. I have chosen to create a border with bias covered corded rope finished with bias facing as the binding. All batik fabrics have been provided to me in my role as an Island Batik Ambassador. Industry partners provided Aurifil Color Builders thread, Schmetz CHROME Microtex Needles and Hobbs Batting used in this 38” X 34” art quilt.

This months project for Island Batik celebrates creativity. What could be more creative than thinking about summer in my kayak while being continually blasted with snow and cold winds during the COVID-19 Stay At Home restrictions?

A.) I begin with sketches transferred to solid white Island Batik on the CutterPillar Glow Ultra. B.) Waterlilies, dragonflies and lily pads were traced on fabric with the Dritz marking pen. C.) Inktense Pencils and fabric medium give the suggestion of dragonflies. D.) Waterlilies and lily pads are given dimension with more Intense Pencil work.

Continued progress on the art quilt includes A.) Inktense pencil work completed on pond items. B.) Quilting begins on Handi Quilter Amara. C.) Quilting lily pad with Aurifil Thread. D.) Ultra-thin Thermore by Hobbs is ideal as the lilies, lily pads and dragonflies will be layered over additional fabric and batting.

A.) Marsh life quilt parts are fussy cut around quilting. B.) Organic shape of finished quilt is cut from art paper to audition placement. C.) Each marsh life piece is traced into place on paper. D.) Additional Inktense pencil and fabric medium suggest shadows under flowers and lily pads.

A.) As I searched through my stash for something to create water, I wonder why would I have camouflage nylon net? And why would I think that it could work here? Who knows...but it did. B.) Lavender nylon net was also in my stash. I used it to create depth behind the dragonflies. C.) After adding metallic threads, Angelina, etc., it will all be held in place with nylon net. D.) Ready to pin nylon netting in place before transferring to long arm for quilting.

A.) Project moved to the Handi Quilter Amara frame for free motion quilting. B.) Close up of free motion quilting on painted lily pad. C.) Close up of free motion quilting on lily and reflection in the water. D.) Using an orphan rope from a coiled rope basket to audition a border idea.
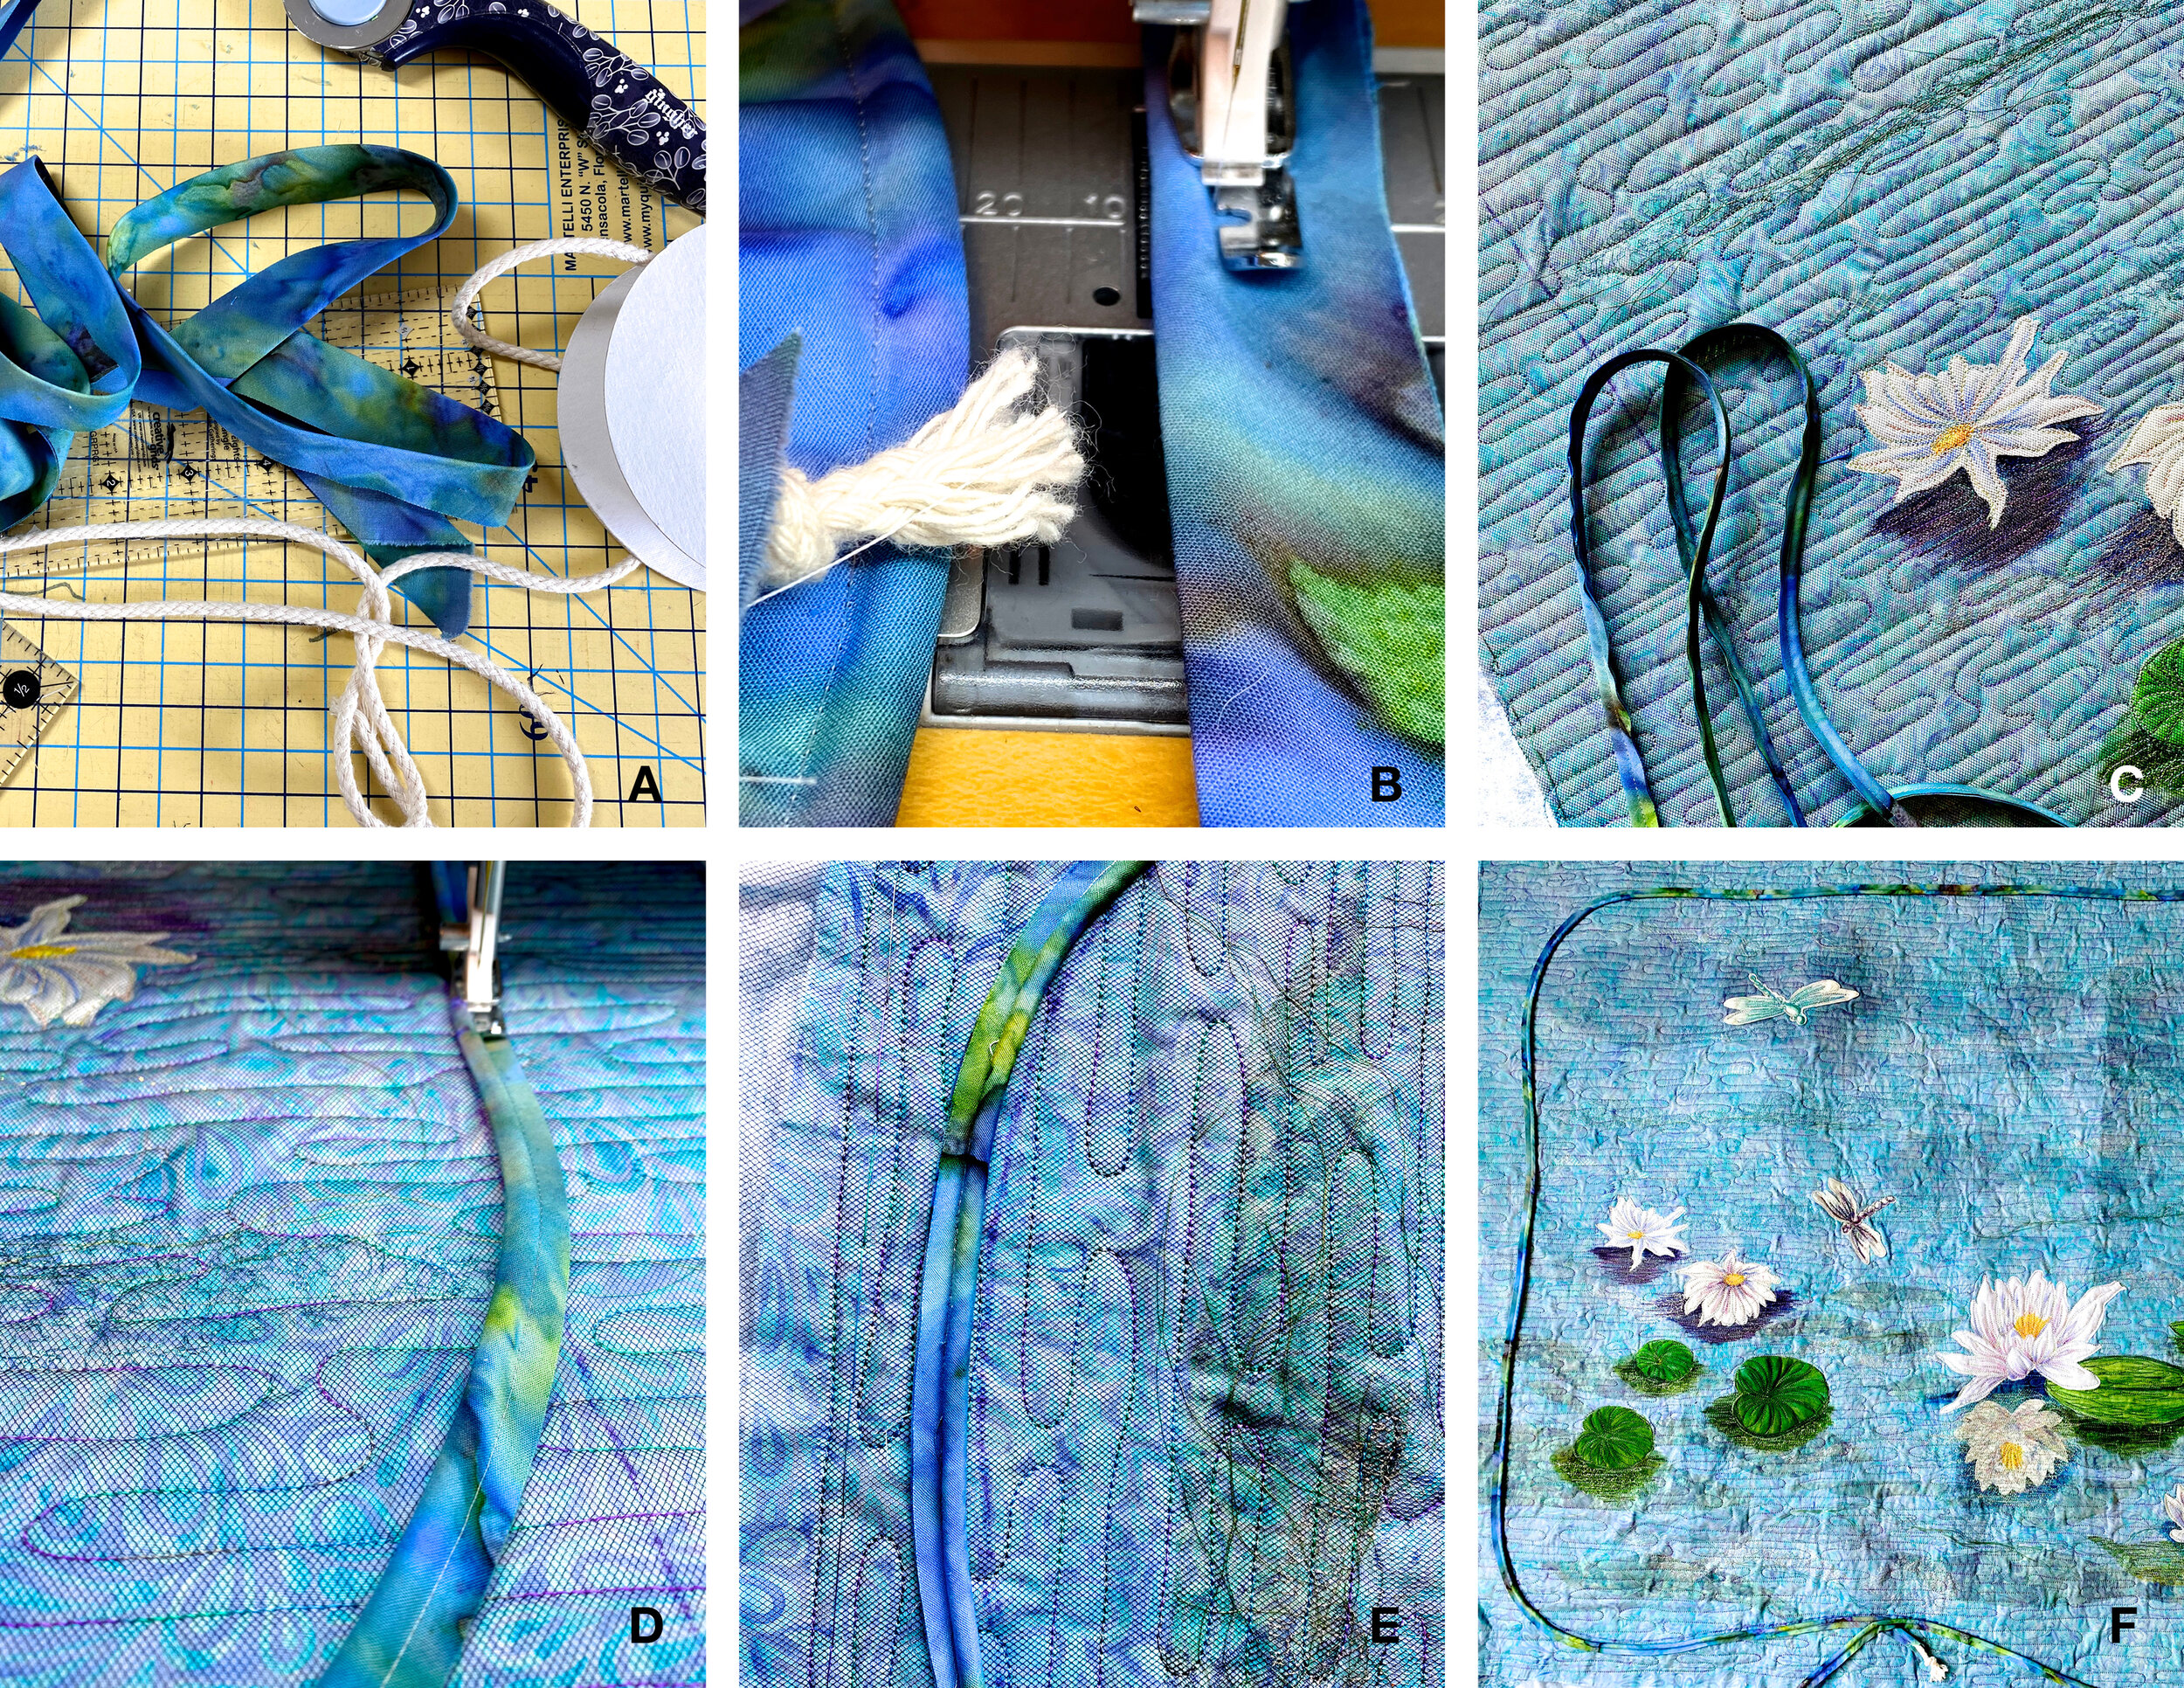
This art quilt calls for an organic border that flows with the water theme. Island Batik Basic Peacock provides the perfect accent. A.) A 2" bias strip is folded in half and pressed. B.) The 3/8" cord is stitched into the fold with a zipper foot. C.) The bias covered cord contrasts with the Crystal Ball Paisley Drops Chambray in the art quilt. D.) Following what will be the flowing outside edge, the bias is stitched one needle width closer to to the cording. E.) The bias cut allows the cord to create curves. E.) Outside edge is ready to trim close to border.

Binding the quilt with a bias facing is the final step A.) The Clover 1/2” bias tape maker is used to form the bias strip to cover all raw edges on the back of the art quilt. B.) With fusible thread in the bobbin and monopoly thread in the needle, one folded edge of the bias facing is stitched. The fusible thread should be on the wrong side of bias facing. C.) The bias facing is pinned then stitched to the raw edge of the right side art quilt over the cording. D.) A basting stitch can be used to ease bias around curves if necessary. E.) The Bias facing is turned to the back of the quilt. Steam facing in place to activate fusible thread. No

Waterlilies Art Quilt is completed. A hanging sleeve has been attached to the back.

Here are a few close up details of the completed quilt.